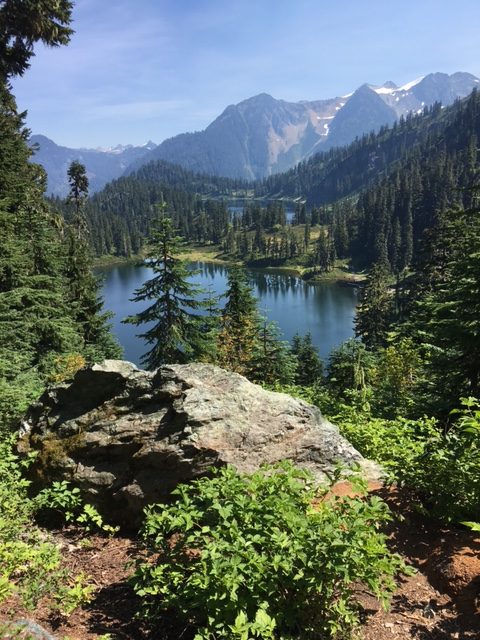

Backpacking and Day Hiking
Backpacking is my favorite outdoor activity. Over the years, I have collected lightweight items that give me a quality camp experience. As I have gotten older, I have also noticed that the quality camp experience is a priority, and have modified my gear list accordingly. For example, for my comfort, I need a thicker sleeping pad, shock absorbing hiking poles and a chair to sit in at the end of the day. I have also found a trekking umbrella extremely useful in high altitude sunny exposed areas as well as for rain. These are non-negotiable in my pack. Bringing heavier items, such as binoculars or a battery bank, are more optional. I weight every item in my pack and list it in a spreadsheet based on how many nights are planned, if I need a bear vault (vs a hanging sack for food storage at camp) and whether there is rain expected or not. The goal is to have a pack that weighs less than 20 pounds (excluding food and water) and total overall weight should not be more than 25% of your body weight.

The spreadsheet looks like this and is adjusted for every trip:

This spreadsheet, that can be edited for your own gear, can be found HERE.
Tips for backpacking for us older folks:
Boots – What you wear on your feet will become the most important piece of backpacking gear. You will want a stable and durable boot with plenty of cushion and arch support. Things to consider in selecting a boot or shoe:
1. How technical will the trail be? If there are lots of roots and rocks to scramble over, you might want a boot with more ankle support and stable footpad. If there are water crossings expected or it is raining, you may want a waterproof boot. For a hiking boot, I use the HOKA Kaha 3 GTX.
2. How dry/hot will the conditions be? On desert trails in hot conditions you may want to wear a lightweight trail running shoe, which would dry over night should they get wet. These are flexible, lighter weight and allow your foot to “breathe” during the hike. These shoes have no ankle support, so determine the use of the trail carefully. For a trail runner shoe, I use the Altra Lone Peak brand.
Insoles – In all boots or shoes, purchase a good arch support insoles – the most rugged you can buy. I use Superfeet Hike Support.
Sock Liners – If your feet tend to sweat, you may want to invest in toe-socks, such as Injinji or lightweight sock liners. The wetter the skin on your feet, the more chance for blisters in unusual places.
Hiking Poles – Another important piece of backpacking gear will be hiking poles. Poles are important for stability and to relieve the constant pressure on your hips and knees. Consider anti-shock trekking poles for a smoother hiking experience on a variety of terrains. Being collapsable is also handy for traveling to and from the trail. I like the cork handles rather than the neoprene, which tend to make my hands sweat and develop blisters.
At the End of the Day – At the end of a hard day of hiking, I really look forward to a sweet treat – something chocolatey or fruity. My husband prefers something salty and fatty, like salami, cheese or nuts. Then I yank off my boots and soak my feet in some cold water, or at least elevate my feet on a log and just lay down. It is also important to do 10-15 minutes of stretches while your muscles are still warm. Specifically stretch your quads, hamstrings, calves, and your core, including your back, sides, plus shoulders and neck. It sounds like an extra chore, but it will repay you when you put that pack on again in the morning!
Making it Fun – Try your hand at carving something from a stick. Be stealthy and try to sneak up on hard to see animals. Learn more about edible and medicinal plants using a downloaded app on your phone. Bring art supplies and a journal. Play some card games or dice with your camp mates. Bring supplies to make woven bracelets. Locate constellations in the night sky. Share stories.
Kayaking
Overnight kayaking is similar to the gear needed for backpacking, but is less concerned about weight and more about space. Canoeing is much easier than kayaking because you can stash all your gear in a couple large totes and cooler, drop them into the floor of the canoe and be on your way. However, a kayak needs time and careful planning to make sure everything is stowed away and correctly weighted or you will not flip.
Weight distribution – consider a 2:1 rear-to-front weight ratio for better stability and control. Heavier items, like food, water and cooking gear should be placed low and near the center of the kayak, while lighter, bulky items, like sleeping bags, tent and clothing can be packed at the ends.
Boat – if you are going out for just a day trip on calm water, you might want to use a sit-on-top kayak, which is easy to get into and out of and is generally stable. There are many options, so consider one that is light-weight that you can easily lift by yourself.
For overnight trips with expected rougher water like we experience in the Pacific Northwest, look for a lightweight sit-in kayak. There are foldable ones, like Oru (starting at just 17 pounds!) or inflatables like Advanced Elements (starting at 25 pounds). Compared to a typical fiberglass 12-foot rigid kayak that weight about 55 pounds, these lightweight foldable or inflatable ones are appealing.
In any boat you choose, you will need a comfortable seat (use extra padding, if needed) and strong back support. Many kayak stores have demo-days where you can try out the kayaks before you purchase.
Dry Bags – always assume your gear will get wet, so use various sizes of dry bags to keep everything protected. It is not fun to pop into your sleeping bag after a hard days travel to find the bottom is saturated with water.
Packing Order – start by placing the heavier items near the middle of the kayak, close to your seat, then pack the lighter items in the bow and stern.
Small Waterproof Stuff Sacks – use these to fill in empty spaces under hatches and to keep needed objects, such as phones and binoculars, close at hand.
Lifejacket – ALWAYS wear a life jacket at all times. Get one that is comfortable, since you will be wearing it all day.
Making it Fun – after you have been paddling more than 20 strokes, you will notice how it affects the skin on your hands. I have found that bicycling or kayaking gloves really help prevent hand blisters. Remember to use the current to do most of the work, if possible. For lakes, rig up a small sail to push you forward, but not so large that a gust of wind could push you over! Stop frequently for pee and snack breaks. Slow expectations or distance goals for the day. Prioritize delicious food and drinks and set up a cozy camp to watch the sunset. If rain is forecast, take a tarp so you can set up your kitchen and lounge area outside and not have to stay in the tent. There is nothing like sitting warm and dry in your camp chair, reading a good book, listening to the rain on the tarp.
Essential Gear List:
- Shelter and sleeping: Tent, tarp (if rain is expected), thick sleeping pad, warm sleeping bag, pillow, sleep clothes and socks, extra cord to hang wet clothes (if temperature is expected to be damp and cold, consider an extra fleece blanket)
- Water: Water bottles, water filter, collapsable bucket
- Cook: Stove, fuel, waterproof matches, cooking utensils, pots and pans, food, food cozy, trash bag, food sack (or bear vault), foil, extra plastic bags
- Hygiene: Toothbrush, toothpaste, bio-degradable soap, toilet paper and trowel, bug lotion, sunscreen, lip balm, vitamins, reading glasses, sunglasses, handkerchief, hand lotion, pee rag (or she-we), paddle gloves
- Permits and Repair: map, permits, duct tape, zip ties, sewing kit
- Electronics: Personal locator device, battery bank, headlamp, GPS, phone, charging cables
- First Aid: First aid kit, emergency blanket, medications, blister treatment, pain relievers
- Clothing: Lifejacket, extra clothes, hat, rain gear, camp shoes, camp towel, extra shoes for around camp or for hiking side trips
- Fun things: art supplies, playing cards, Frisbee (can also double as a cutting board or platter), camp chair, small kite (it is always windy near the water!)
Bicycle touring
Bicycling can be enjoyed at any age and, with the prominence of ebikes, makes it even easier for us older folks to enjoy the outdoors. In bicycling, you will want to keep your load as lightweight and compact as possible.
Bike – look for one that is lightweight and has shock absorbers in the seat and handlebars. A large, padded seat is also a plus. If you will be primarily riding on paved roads, consider the smaller tires of a road bike. If your trail will lead you off-road occasionally, use a mountain bike, with larger tires that grip the terrain. Or you can simply purchase hybrid tires on a mountain bike that will serve well on the road or the rough.
eBikes – the battery is everything on an ebike. It is worth the money to purchase a reputable battery. For example, I purchased a more inexpensive ebike, but it runs out of power after only 20 miles, although the marketing says it will run 70 miles.
How you use the bike (assist level), its weight, the rider’s weight and the terrain are all important factors in determining battery life. Larger, higher capacity ebike batteries offer a great range but due to their size are heavier, which can affect the handling of your bike and your performance. Also remember that cold temperatures can reduce battery performance because they discharge faster at lower temperatures.
Note that for long-distance riders, such as for touring, you will need a higher capacity battery.
Essential Gear List (note all items need to be in paniers or dry bags strapped to the bike:
- Bike, helmet, mirror (either on bike or helmet), headlight, taillight (extra batteries), bike lock, hand pump, bike multi-tool, chain lube, rag (for oily messes)
- Shelter and sleeping: Tent, tarp (if rain is expected), thick sleeping pad, warm sleeping bag, pillow, sleep clothes and socks, extra cord to hang wet clothes (if temperature is expected to be damp and cold, consider an extra fleece blanket)
- Water: Water bottles, water filter, collapsable bucket
- Cook: Stove, fuel, waterproof matches, cooking utensils, pots and pans, food, food cozy, trash bag, food sack, foil, extra plastic bags
- Hygiene: Toothbrush, toothpaste, bio-degradable soap, toilet paper and trowel, bug lotion, sunscreen, lip balm, Vaseline (or chamois cream for chafing), vitamins, reading glasses, sunglasses, handkerchief, hand lotion, pee rag (or she-we)
- Permits and Repair: wallet (at least one credit card, some cash and ID), map, permits, duct tape, zip ties, sewing kit
- Electronics: Personal locator device, battery bank, headlamp, earbuds, GPS, phone, charging cables
- First Aid: First aid kit, emergency blanket, medications, blister treatment, pain relievers
- Clothing: Reflective lightweight rain jacket (or visibility vest), insulation layers for cool air, versatile shoes (for walking around as well as for riding), quick-dry shirts and bike shorts, cycling gloves, set of lightweight clothes to wear in the evenings, hat, camp towel
- Fun things: explore towns, cities, historical sites, museums, festivals, take a short hike, document trip and post on social media, try new foods
Car Camping
For comfortable and enjoyable camping experiences, seniors should consider specific gear choices like instant-up tents for easy setup, bed-height air mattresses or cots for comfortable sleeping, and sturdy chairs with armrests for easy sitting and standing. Clear tubs for organizing gear and hammocks can also enhance the camping experience.
Here’s a more detailed look at helpful gear:
Sleeping – consider an Instant Tent for quick and easy setup. They come in a variety of sizes. Be sure to get one that will be large enough for a cot, if you are planning to use them.
Mattress or Cot – elevated sleeping surfaces such as a bed-height mattress, make it easier to get in and out of bed, reducing the need to bend or squat. Similar to air mattresses, cots offer an elevated sleeping surface and can provide extra comfort and support.
Sleeping Bags – rectangular-shaped sleeping bags offer more legroom, which can be beneficial for seniors.
Seating – choose chairs with wider seats and sturdy armrests for easy sitting and standing.
Camp Tables – provide a convenient surface for meals, games, and organizing gear.
Clear Tubs – help keep gear organized and easily accessible.
Portable Stoves and Cooking Equipment – simplify meal preparation.
Make Ahead Hobo Foil Packets and Sheet Pan Meals – reduce cleanup time.
Other Helpful Tips:
- Travel with a group of friends: Having support available can be invaluable, especially for long-distance trips or in case of breakdowns .
- Use a rain fly. This will protect against rain and dew.
- Bring extra blankets. This allows for easy adjustment to changing temperatures.
- Borrow gear. Consider checking out gear from libraries or organizations to reduce costs.